
Visualization: Chart

Google Chart Tools provide a perfect way to visualize data on your website. From simple line charts to complex hierarchical tree maps, the chart galley provides a large number of well-designed chart types. Populating your data is easy using the provided client- and server-side tools.
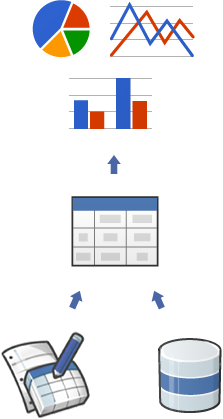
Chart Library

Charts are exposed as JavaScript classes. Google Chart Tools provides many chart types for you to use. Although the default appearance is best for most situations, you can easily customize a chart to fit the look and feel of your website. Charts are highly interactive and expose events that enable you to connect them to create complex dashboards or other experiencesintegrated with your webpage. Charts are rendered using HTML5/SVG technology to provide cross-browser compatibility (including VML for older IE versions) and cross platform portability to iPhones, iPads and Android. No plugins are needed.

DataTables

All charts are populated with data using a common JavaScript DataTable class. Having a common data structure makes it easy to switch between chart types. This class exposes methods for sorting, modifying, and filtering data. You can populate a DataTable programmatically from data that you retrieve from your own database, or you can request data from a data provider that supports the Chart Tools Datasource Protocol.

Datasources

You can query websites that implement the Chart Tools Datasource protocol. The Datasource protocol includes a SQL-like query language, and is implemented by Google Spreadsheets and Google Fusion Tables, as well as third party data providers such as SalesForce. You can even implement the protocol on your own website and become a data provider.
 And many more

Comments

Popular posts from this blog

HTML Emailing in ZF2

<?php namespace Application\Model; use Zend\Mail\Message; use Zend\Mime\Message as MimeMessage; use Zend\Mime\Part as MimePart; use Zend\Mail\Transport\Sendmail as SendmailTransport; use Zend\Mail\Transport\Smtp as SmtpTransport; use Zend\Mail\Transport\SmtpOptions; use Zend\View\Renderer\PhpRenderer; use Zend\View\Resolver\TemplatePathStack; use Zend\View\Model\ViewModel; use Zend\View\Model\ModelInterface; class ApiEmail extends ApiInterface {    protected $From = "XXXXX@gmail.com";    protected $FromName = "XXXX";    protected $To = "" ;    protected $Subject = "" ;    protected $Body = "" ;    protected $Cc = "XXXXXX@gmail.com";    protected $Bcc = "XXXXX@gmail.com" ;    protected $ReplyTo = "XXXX@gmail.com" ;    protected $Sender = "" ;    protected $Encoding = "UTF-8" ;    protected $MESSAGE ; // getter setter    public fun

How to setup django | django installation ubuntu

Introduction to Django 1.     High level web framework 1.     Basic modules, classes, and tools to quickly develop and deploy web apps 2.     Contains an ORM (Object-Relational Mapper) that allows for the use of standard Python language syntax when interfacing with a back-end database. 1.     Developer need not learn SQL, DDL, etc! 3.     Provides a template framework that allows HTML, XML, and other “documents” to be converted into “templates”, which can then be converted to “output” via a wide range of substitution techniques. 4.     Elegant URL support (fancy, beautiful URL's, no “?blah=blah”, etc.) 5.     Multi-lingual 2.     Fast and easy to use, robust, flexible, and lots of contributed components available! 1.     Built in administrative interface to manage data models. 2.     Built-in authentication/access control components 3.     Contributed Installing & Configuring Django Components 1.     Django can be downloaded from http://w

How to start working with Django web framework

 Django is a powerful web framework for Python that makes it easy to build web applications quickly. Here are some steps you can follow to start learning Django programming: Install Python: Django requires Python to be installed on your machine. If you don ' t already have Python installed, you can download it from the official Python website (https://www.python.org/downloads/). Install Django: Once you have Python installed, you can use the pip package manager to install Django. Open a terminal or command prompt and type the following command: pip install django Create a new Django project: To create a new Django project, open a terminal or command prompt and navigate to the directory where you want to store your project. Then run the following command: django - admin startproject myproject Replace myproject with the name you want to give to your project. This will create a new Django project with the specified name in the current directory. Run the development